Frequently Asked Question
Configuring DNS setting on Chromebook
Last Updated 7 months ago
Step 1: Open Settings
On a Google ChromeBook you will need to update the network in the settings panel. You can access the settings panel by clicking the “magnifying glass” on your ChromeBook dashboard.
Search for “settings“.
It opens default to the Network section:
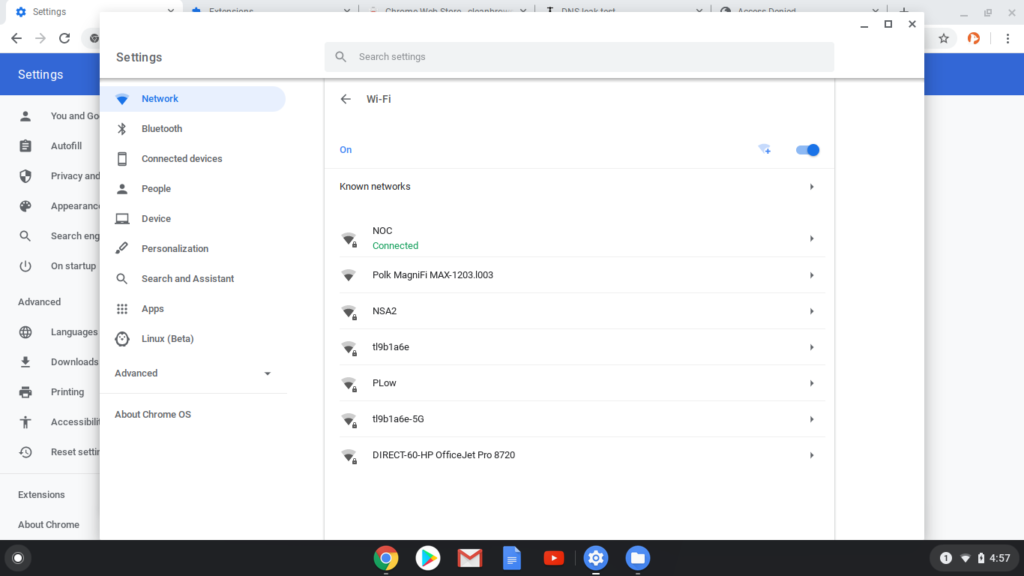
Step 2: Configure DNS In Settings
Now navigate to the DNS Section of your device. Click the network that says “connected”:

Select the “network” option:

Scroll to where it says Name Servers.
Select 'use google name servers'
That’s it. Now close the settings dialog and it should be set. ChromeBook does not have an apply or save option.